Do you want a beautiful parkway or walkway? Flagstone could be your solution.
Parkways, the area along the city street, are often difficult to plan landscapes when the grass lawn is removed. This is where you will typically enter and exit cars so you want the area to be clean, easy to maintain and handle foot traffic as well. Flagstone and Decomposed Granite or Gravel if done correctly can be this solution.
Many people will use DG / Decomposed Granite, or gravel in these areas, but these solutions can sometimes be troublesome, unwanted or just boring.
My friends over on the Hermosa project also had a different and unexpected issue with the area in front of their home along the street, erosion.
Several years ago we removed the lawn in the front yard. Now I still like lawns with the right use, but in this case the city went to tiered billing for the water and it was quite a jump from the lower tiered water rates to the second and especially the third tier. And though my friends are extremely frugal with water use, the size of their property alone boosted them to the upper echelons of water billing rates. The only solution was removal of lawn and to replace it with drought tolerant and low water use plants.
With the lawn removed and several retaining walls, DG and plants installed in the front yard, we ran into the unexpected issue. During the first rain, water was running down the street and gained some real momentum at their driveway. The rainwater actually ran uphill into their driveway a couple feet, ran over the curb and washed out the DG. Although this area was on the uphill side of the curb, well above the street it took a beating before it ran back over the curb and continued down the road.
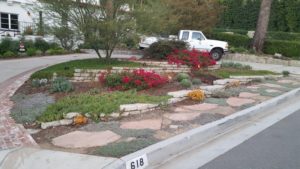
The solution we chose to resolve the problem was to use DG along with flagstone and groundcover in the areas where erosion occurred. This resolved the problem and provided a very attractive and functional walkway / parkway. Gravel was considered as an alternative but we agreed that it was not the look we wanted in this particular area.
Here are the steps we used along with finished views of the project a couple years later.
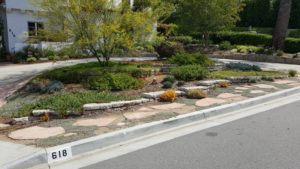
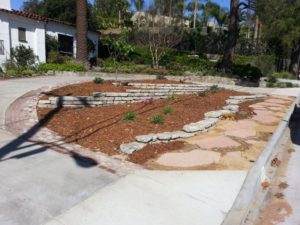
Let’s start with the finished look a couple years after the job is complete. The Dymondia ground cover is holding the DG in place and can easily handle the traffic when people get in and out of the cars as well as pedestrians.
Now let’s get into the flagstone construction phase of the project.
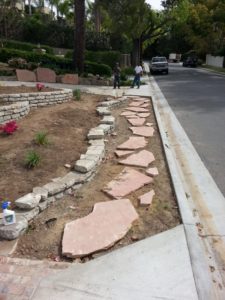
Step one is to grade the area and bring in the flagstone. This is just to make certain you have the correct quantities and you can set the larger pieces into the approximate area they will sit. If you are working with smaller pieces you can set them in to place right away.
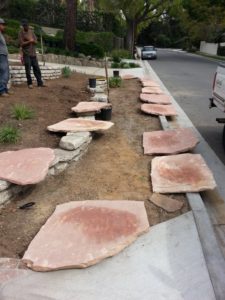
Step two is to set the larger pieces of uncut stone into place. You can move the unnecessary pieces out of the work area to make it safer to move around.
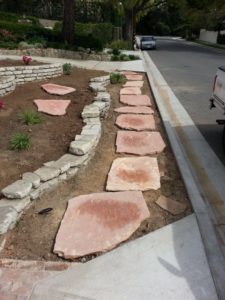
Step 3 is to cut the pieces into the size and shape required for the look and pattern you want.

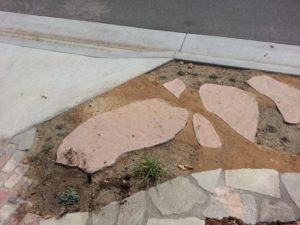
Step 4 is where you have the finished pattern laid out exactly as you want the finished look.
Step 5 the stone is mortared into place. You can lay the stone directly into the soil but this will actually take more time than using mortar.
Step 6 is to complete adding planting and fine tune the DG around the planted areas.
Step 7 in this project was to add more detail to the walkway after you have used it a while. Add or subtract stone and plantings as necessary. Also, add DG in areas that have settled.
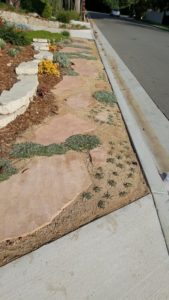
Step 8 is to just enjoy your handywork. Plants have grown in are starting look established.

Some extra ideas
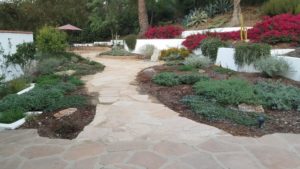
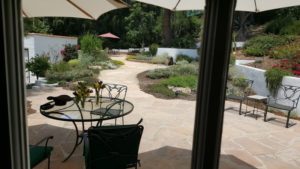
Here are some pictures of the rear yard walkway and patio.
The patio was installed by me about 20 years ago. The walkway with DG and Flagstone a few months after the front walkway.
This is a great view looking out of the rear living room window.
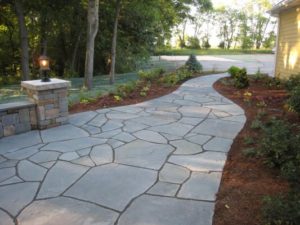
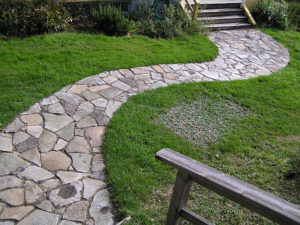
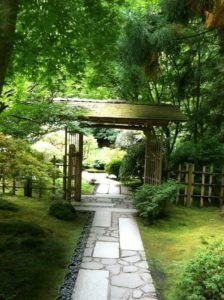
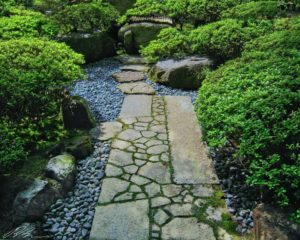
Finally lets take a look at several other styles of flagstone walkways. Enjoy.